
A sloped-ceiling wardrobe is not a standard cabinet with its top cut diagonally. The ceiling height changes across the run, and that affects hanging space, drawer access, door movement, lighting and the ability to reach stored items. Start with the room section and the storage brief; choose the outward style only after those two inputs agree.
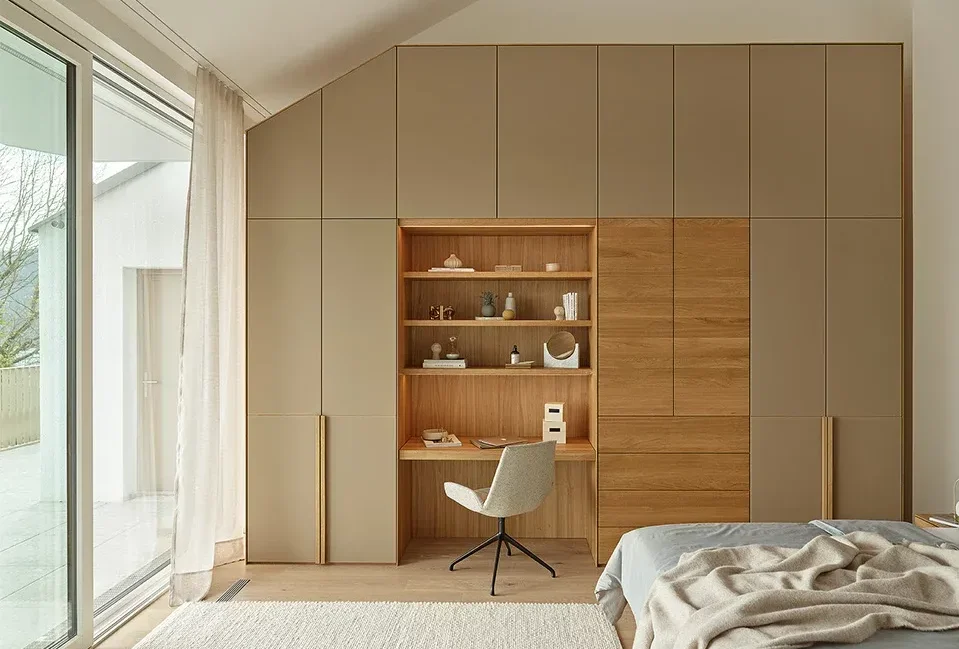
Choose how the cabinet responds to the slope
There is no single correct form. Compare the options against the usable height, the items to be stored, the door path and the amount of site variation that must be absorbed.
| Possible approach | Useful when | Check before choosing it |
|---|---|---|
| Fronts follow the roof line | A continuous built-in elevation matters and the final ceiling profile can be measured reliably. | Each shaped front, hinge position and opening path must suit the actual geometry. Confirm how site variation and finishing gaps will be handled. |
| Stepped cabinet heights | Regular cabinet modules or repeated door sizes are more important than a continuous diagonal line. | The steps may leave open areas or fillers. Decide whether those areas are intentional, accessible and easy to finish. |
| Low storage below the eave | The lowest area cannot support comfortable hanging or full-height doors but remains reachable from the room. | Confirm drawer or door clearance, floor or skirting interference, and whether a user can reach the back without awkward bending. |
Measure a section, not only a floor plan
A room width and one maximum height cannot describe an inclined ceiling. Prepare a plan plus at least one clear section through every wardrobe run. Where the roof, floor or wall is uneven, record several vertical measurements rather than assuming that one straight line represents the whole surface.
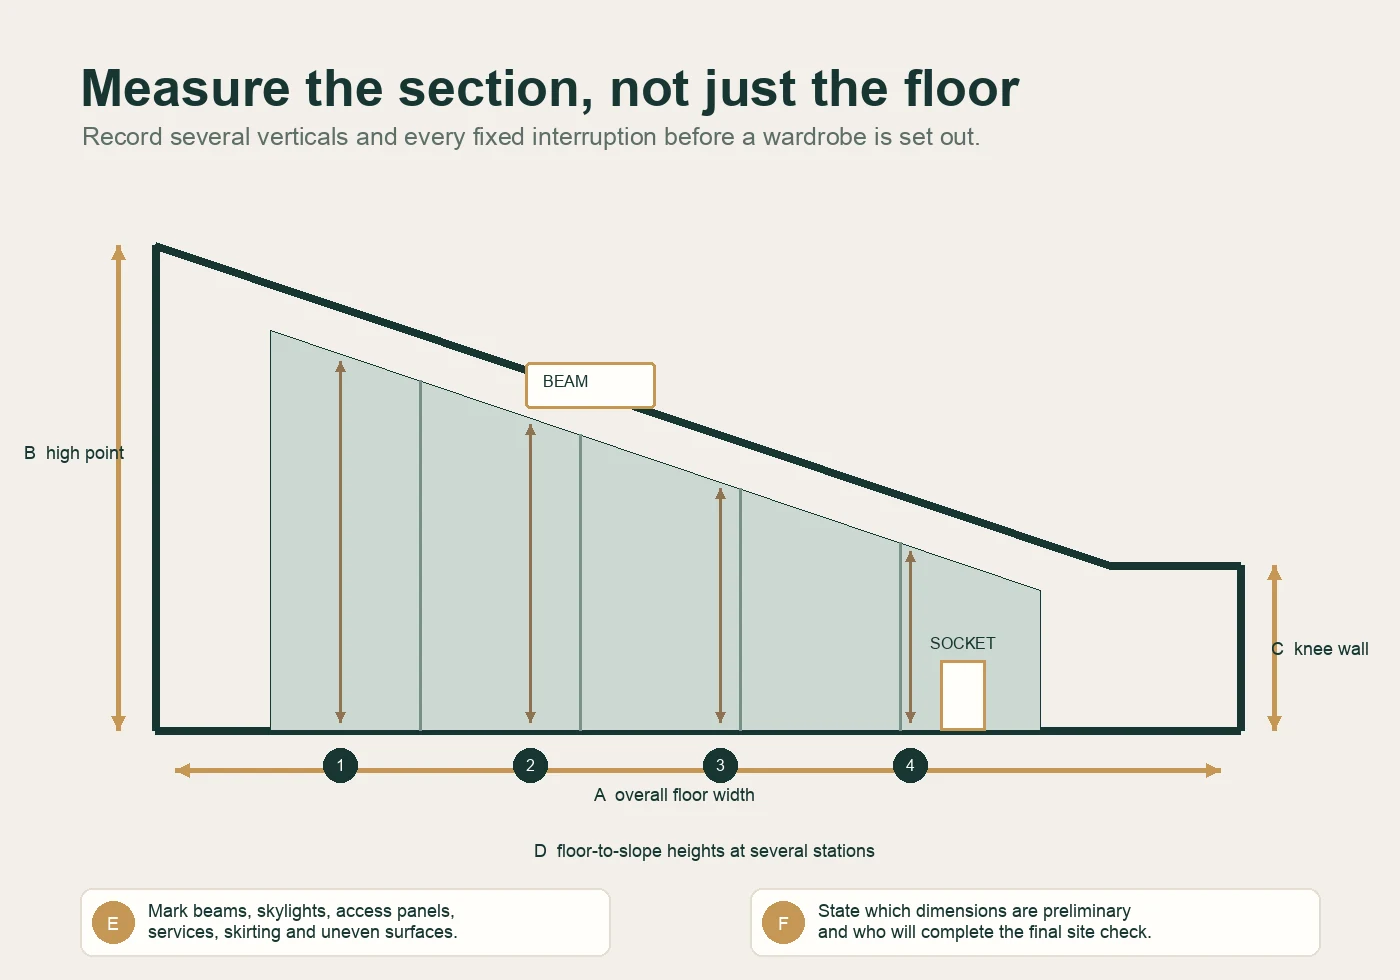
Put these items in the measured-room pack
- A dated plan: wall lengths, door and window positions, and the intended face line of the wardrobe.
- Sections at the cabinet runs: the high point, low or knee-wall height, the position where the slope begins, and floor-to-ceiling or floor-to-slope heights at several stations.
- Fixed interruptions: beams, roof windows, access panels, radiators, sockets, switches, vents, skirting and any item that must remain accessible.
- Surface conditions: photographs of the whole wall and its junctions, plus any visible unevenness. A photograph can locate an issue but cannot replace a verified dimension or a local condition assessment.
- Dimension status: mark whether each value comes from an early drawing, the finished room or a final site check, and name the party responsible for approving production dimensions.
If floor, wall or ceiling finishes are incomplete, record their expected build-up and keep the cabinet dimensions subject to a final agreed check. Structural, moisture, insulation and electrical questions belong with the responsible local professionals; a wardrobe drawing must not be used as their approval.
Match storage to usable height and reach
Begin with an item list: short hanging, long hanging, folded clothes, shoes, bags, luggage and accessories. Then place the most frequently used items where the user can reach and open them comfortably. Do not force full-height hanging into the low end merely to fill the elevation.
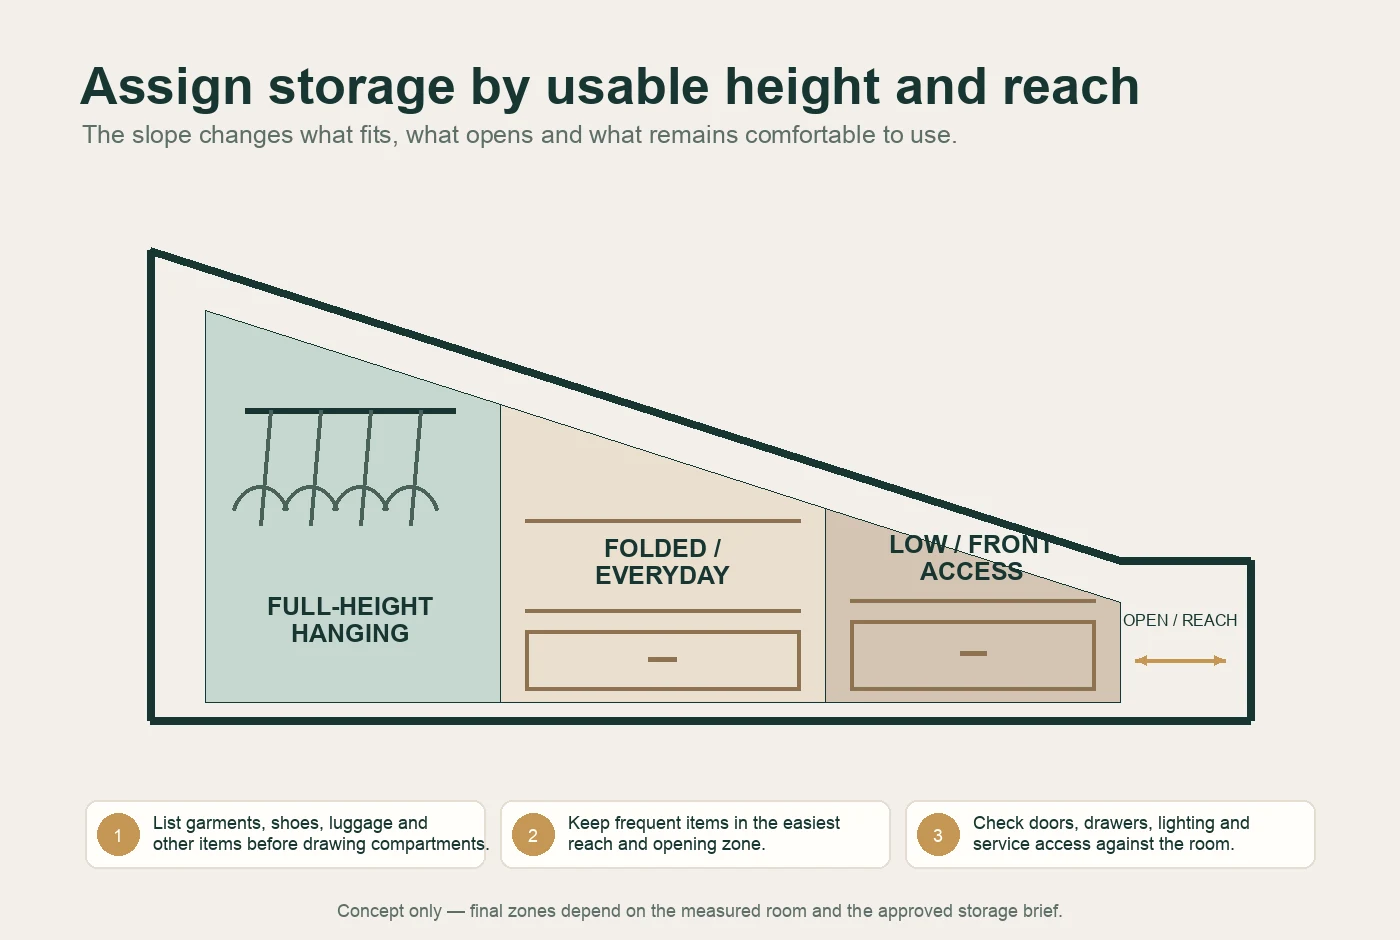
| Zone | Possible uses to test | Project checks |
|---|---|---|
| Highest usable area | Long or short hanging, taller doors, or higher shelves for less frequent items. | Reach, door height, lighting, roof-window or beam interference, and whether an access aid would be safe and practical. |
| Transition below the slope | Short hanging, folded storage, shelves or drawers that step down with the ceiling. | Usable internal height after cabinet construction, drawer movement, hinge positions and access to the back. |
| Lowest reachable area | Shoes, shallow shelves, pull-outs or front-access bins where the room allows them. | Kneeling or bending effort, handle reach, floor and skirting conditions, and collision with beds, benches or circulation. |
Check the room in front of the wardrobe
The cabinet can fit the ceiling and still be awkward to use. On the plan, draw every hinged door and drawer at its open position. Check the path against the bed, bedside furniture, roof posts, lights and the route a person uses to enter or dress. A shaped hinged front, a stepped bank of regular doors, an open section or another door system may each be suitable in different parts of the same run; the selected hardware and clearances must be confirmed for the project.
Also identify anything that must remain serviceable after installation. Do not close an access panel, socket, ventilation path or inspection point behind fixed cabinetry unless the responsible site party has approved how it will be reached. Confirm who supplies lighting, who provides power, who prepares the wall and floor, who performs the final site measurement, and who installs and makes good around the cabinet.
Prepare the brief before requesting a configuration
- Send the dated plan, room sections and photographs, with preliminary dimensions clearly separated from final verified dimensions.
- List the items to store and identify which ones need easy daily access, full-height hanging, drawers, lighting or occasional high storage.
- Mark doors, windows, roof lights, beams, services, access points and furniture that limits the opening or approach space.
- State the project country or region, room status, expected finish date, and who can complete the final local measurement and installation handoff.
GEORGE Group can discuss a project-configured wardrobe package, but the final construction, hardware, dimensions, site preparation, installation scope and responsible parties are confirmed for the individual project. General wardrobe-system comparisons belong on the wardrobes and closets overview; general walk-in circulation belongs on the walk-in closets page. This page is limited to the irregular geometry created by a sloped ceiling.
Start a sloped-ceiling wardrobe enquiry. In your message, include the country or region, the room plan, at least one measured section, photographs of the entire ceiling line, the storage priorities and the party available for final site verification. Ask how to share drawings and image files through the confirmed project channel.